

Established in the late 1800s, the George Cleverley name embodies a heritage steeped in precision within the realm of bespoke shoemaking, a process that has persevered with virtually unchanged integrity. Delving into the meticulous process of crafting luxurious handmade shoes, this journey unfolds through five distinctive stages: measuring and last making, intricate pattern cutting and clicking, closing, making, and finally, the exquisite finishing touches.


Measuring
The crucial first stage in the making of bespoke shoes at George Cleverley is the measuring of the client's foot we note any client-specific peculiarities and transpose the client’s foot into a wooden model of the foot, called the “last.” Given the importance of these first evaluations, it is highly desirable that the craftsman measuring the foot also makes the last, as he can best understand the requirements for a proper shaping and, ultimately, the perfect fit. Our approach to bespoke shoemaking is simple – we pair the client with the craftsman throughout the entire bespoke process, from start to finish.
Measuring starts by tracing around the foot and noting any characteristics such as corns, fallen arches, prominent bones, etc. Measurements are then taken at the widest part of the foot (i.e. from the big toe joint to the little toe), from the bottom of the instep to the top of the instep, and from the top of the instep to around the bottom of the heel.
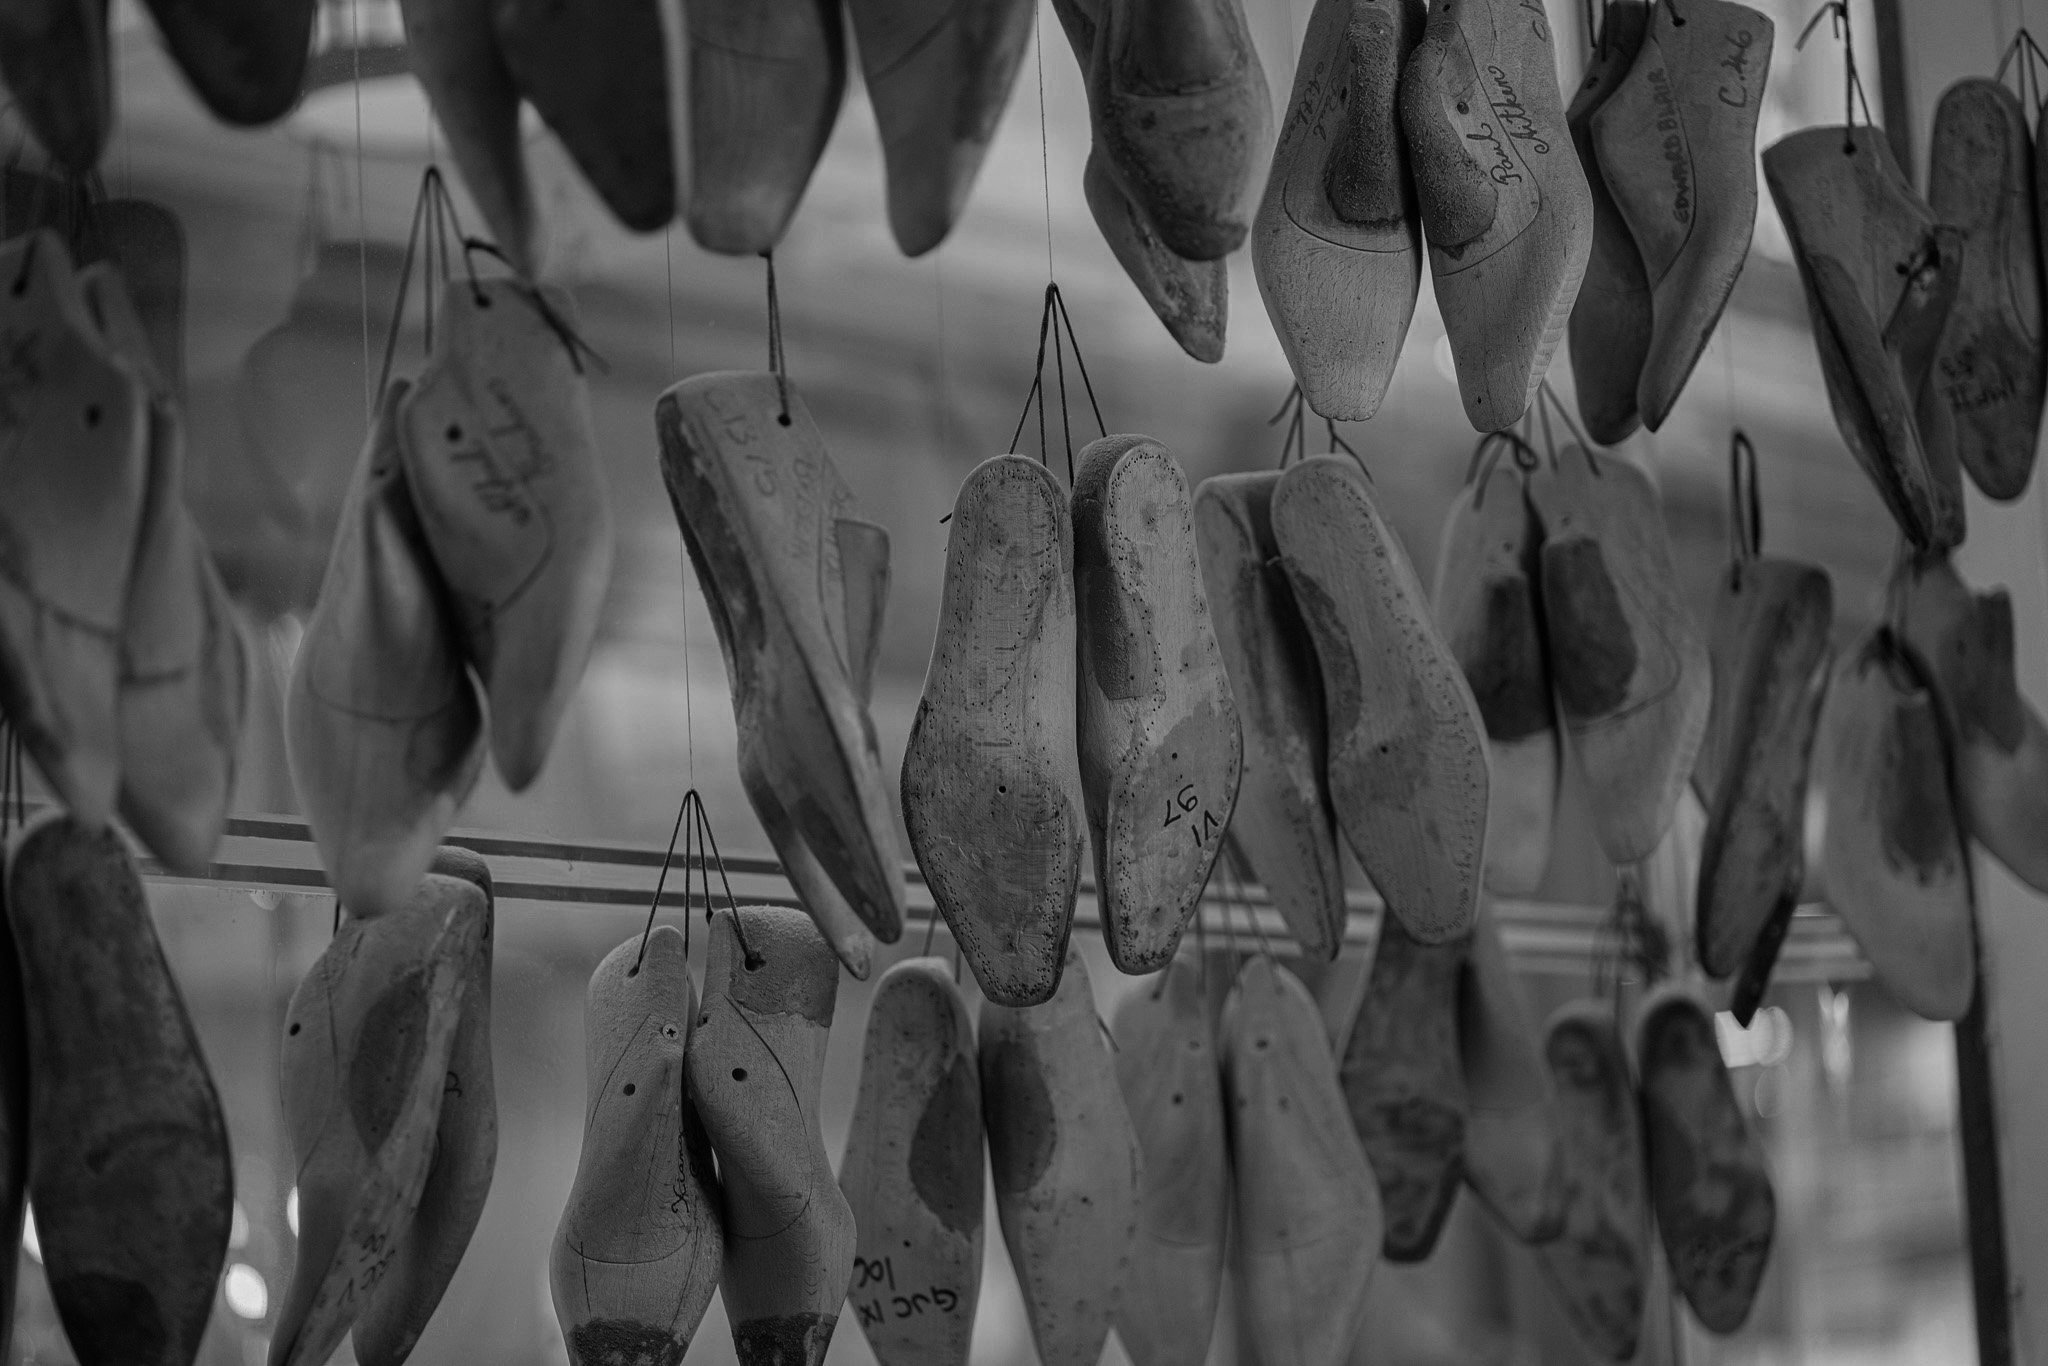
Last Making
With these measurements, the last maker will then use their expertise to begin fashioning the wooden last. Starting out as a block of wood, and gradually shaped to the required form, the craftsman files with a rasp and whittles with a special knife. A fine rasp and sandpaper are then used to complete the model. The key skill for the last maker is his ability to see a shape in his mind's eye and transpose it onto initial wooden block.


Pattern Cutting and Clicking
The cutter can then take over the next stage, having been supplied with the client-specific measurements and the finished wooden last. The cutter's first job is to make a paper pattern for the style of shoe the client specified in the initial stage of the process. The pattern consists of various pieces: vamp, cap, tongue, quarters. These various pieces of paper pattern are used as guides in cutting the pieces leather which go to make up the upper.
Like the last maker, the cutter is highly skilled who has the ability to design a shoe on paper and convert that design into the beginnings of a bespoke shoe. Cutters must balance client desires and wishes with decades-old experience in order to choose appropriate leathers - judging their weights, pliability, and quality. The cutter is responsible for buying leathers used in the making of bespoke shoes.
Closing
The cutter then gives the last, patterns, and cut leather to the closer, who stitches the various pieces together to form the finished uppers. At this stage, the closer will fit linings and the various trimmings such as binding, elastics and pull-on loops, the add detail of broguing and lace holes, etc. that are all part of the unique client order. Having fit the various pieces together, the closer then pulls the finished upper over the last to ensure that it conforms to the required shape.
The upper is then tacked into place. At this stage in the process, a new customer (whose last is being used for the first time), would be invited to attend a preliminary fitting to check that the last and fit are correct. If necessary, any slight adjustments can then be made to the last.
Finishing
The maker then gives the completed shoe to the finisher, who draws the last from the shoe, addresses inside the shoe, and fits the seatsocks. Using brushes, cloths, and polish mixed with water, the finisher then transforms the shoe, bringing it up to a deep glossy finish. An experienced finisher can greatly enhance the finish and appearance of a shoe and achieve the final outcome our clients appreciate. Thus, his contribution is just as important as that of his colleagues.

Making
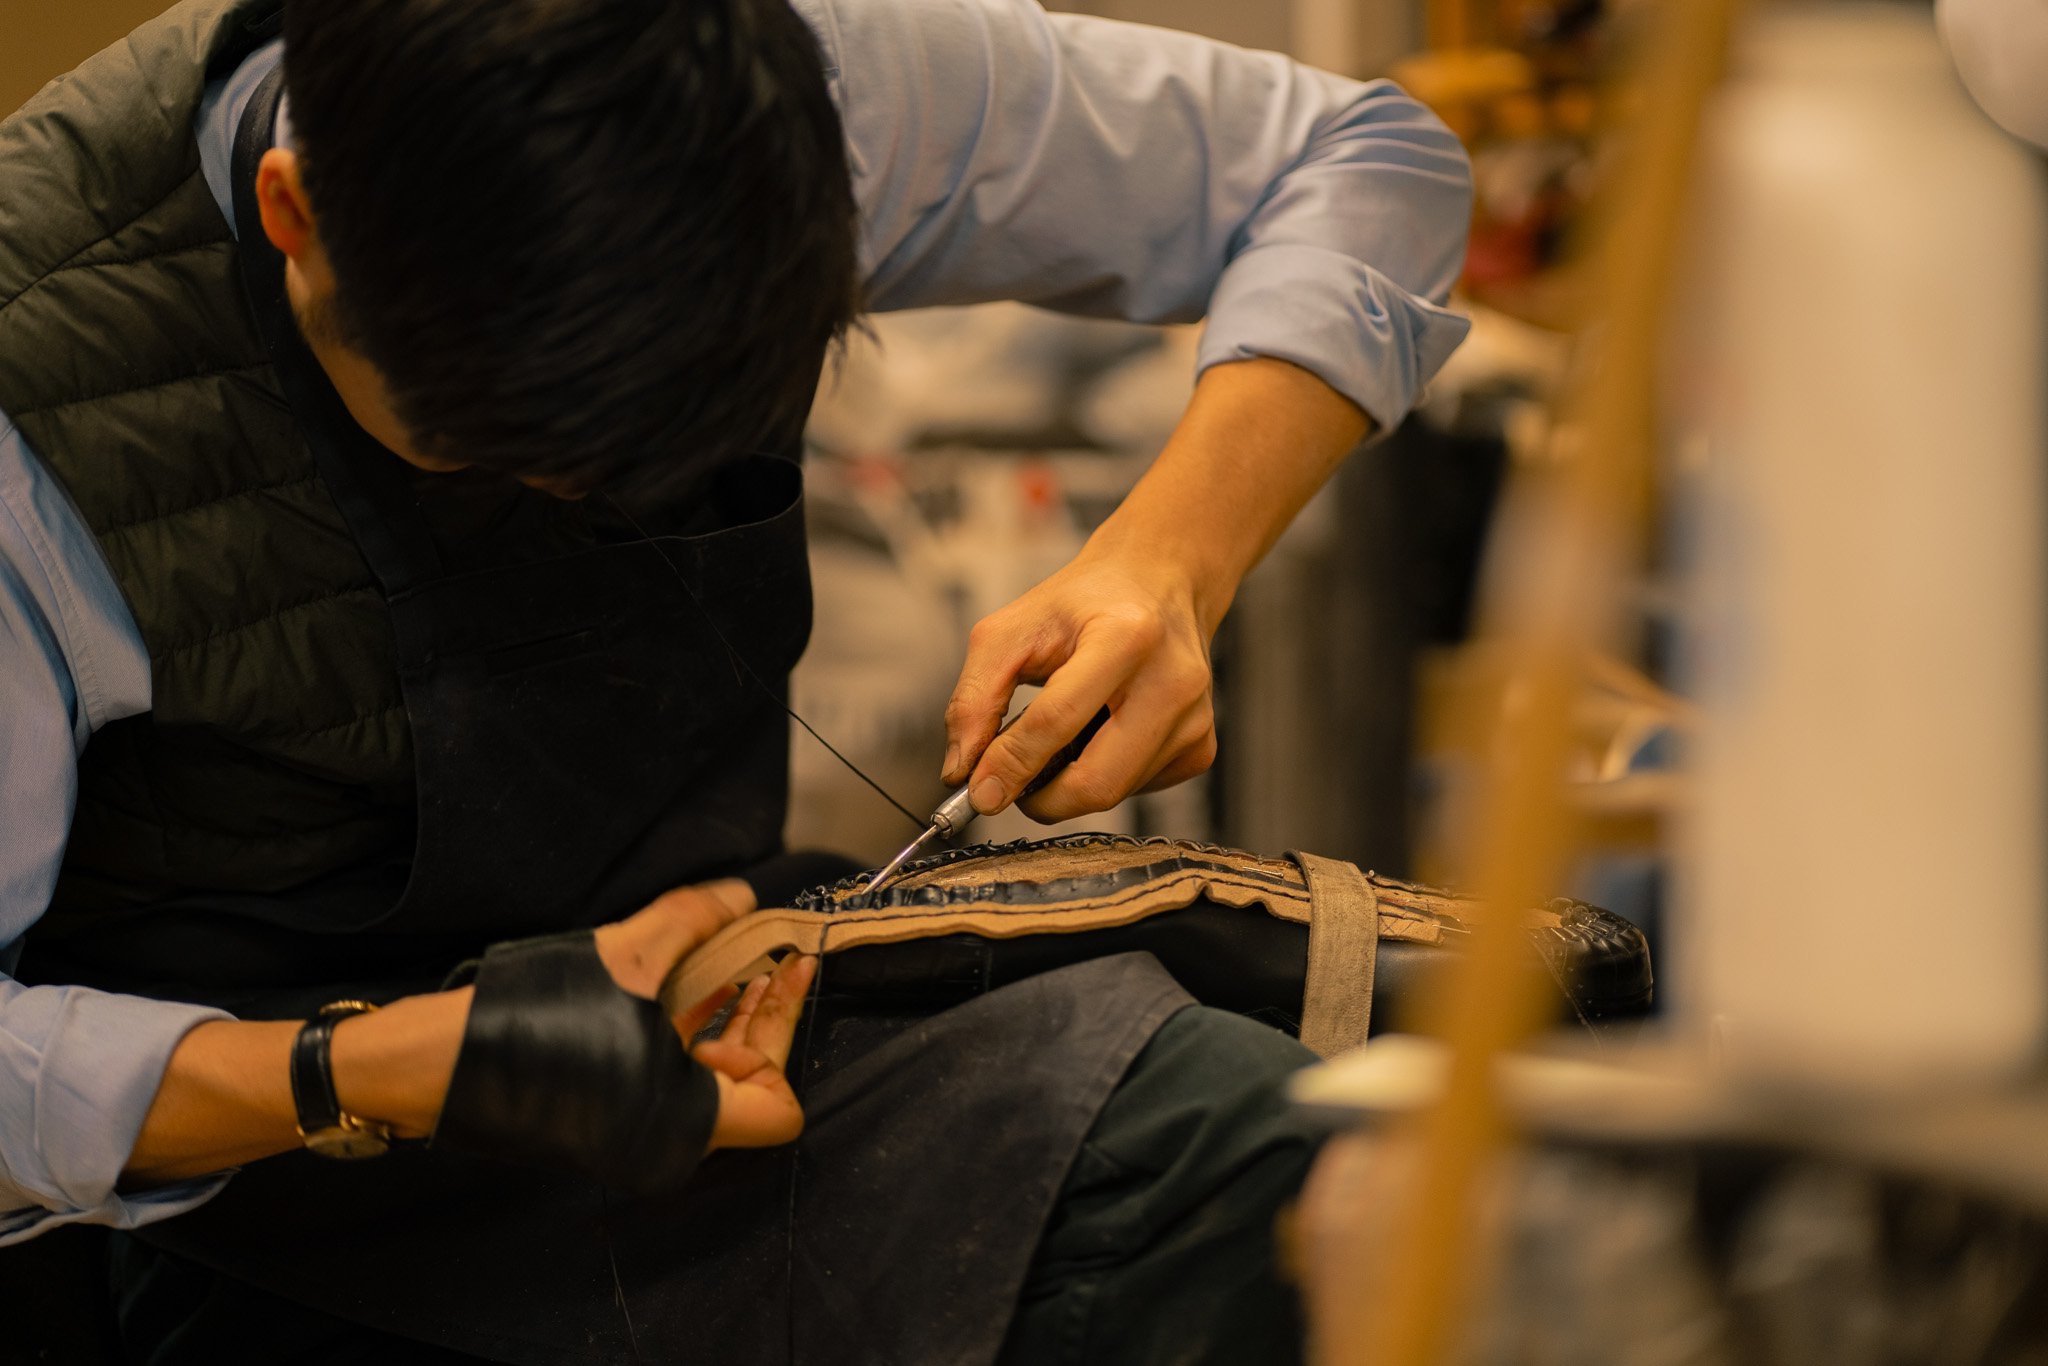
When the upper is completed, the bespoke last moves to the maker. The maker adds toe and heel stiffeners and shapes the insole to the bottom of the last, having first soaked the bottom leather to allow for proper shaping specific to the client’s foot and preferences. the final shoe shape is then molded to the bottom of the last and the upper is drawn taut and sewn to the welt (the welt holds the upper to the sole). Tensions must be even throughout the shoe until the upper fits the wooden last like a glove.
The maker then stitches the bottom sole to the welt using a precise number of stitches per inch; the appropriate number of stitches depends on the weight of the leather being used, which we have perfected through 90+ years of expertise. The heel and bottom of the shoe is then added to provide the finished look (the finish to the bottom of the shoe is very important and demands a high degree of skill to complete).

